Setting up SantoWarden
What SantoWarden is (read this first)—this document is a tutorial on how to use your new SantoWarden account.
SantoWarden is a password vault that lives in the cloud. It runs Bitwarden‑compatible software, which means you use the normal, free Bitwarden apps—but instead of storing your passwords on Bitwarden’s servers, they’re stored securely on your SantoWarden account.
Two words we’ll use a lot:
- The app (client) — the Bitwarden program you install on your phone, computer, or browser. The client is just the “window” you look through, an app installed on your phone, computer, or browser.
- Your vault (SantoWarden account)—where your encrypted passwords actually live in the cloud (you can only access this account with your web browser like any other webpage).
For existing Bitwarden users (wanting to migrate your existing passwords)
(If you are a new user, skip to the next section, “Using Your Account.”)
If you are currently using Bitwarden and you want to keep your existing passwords and migrate them into your new SantoWarden account, you should first export your passwords in the .json format. In your Bitwarden app, go to Settings –> Vault Options –> Export –> .json
Save the file to a directory you can find easily. You will want to delete this file after you import it into your new SantoWarden account. Better yet, you may keep a backup copy on an encrypted drive like Proton Drive. You can also export your vault as an encrypted .json file (see the export options below, in figures 1-3).
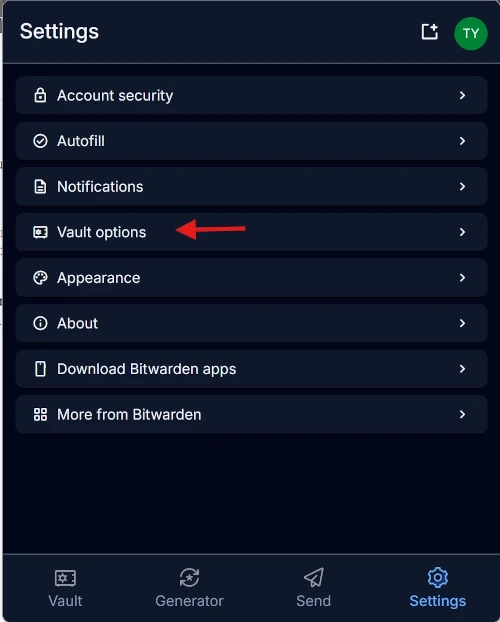
Figure 1
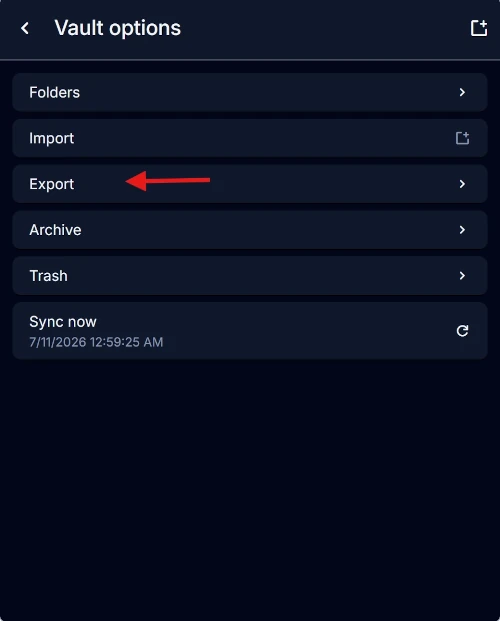
Figure 2
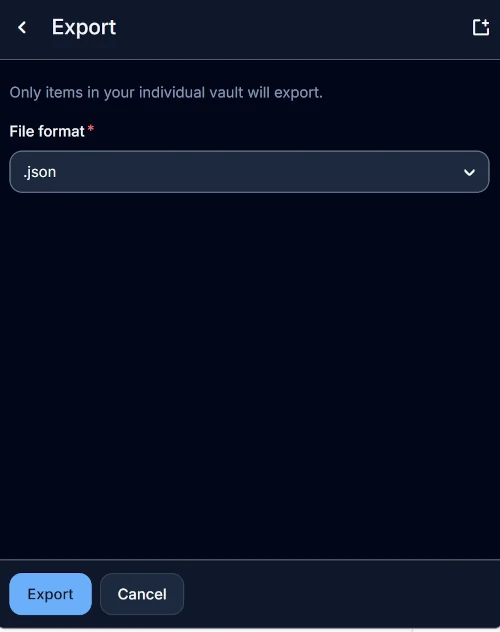
Figure 3
Next, log out of your Bitwarden client by clicking your profile circle in the top right-hand corner and then selecting “log out.”
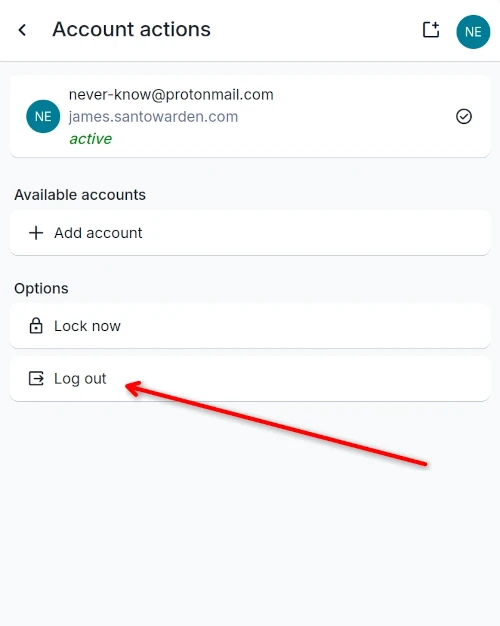
Figure 4
Using Your New Account
| Important! When you sign up for your free trial of Santowarden, you will receive two emails. One email gives you a link to set your initial password (you will enter the password twice). The next email will remind you of your new domain, which ends in santowarden.com. This is the URL you will always use to access your new Santowarden vault. It uses a subdomain and looks like this (your-name.santowarden.com). These two bits of information are in the confirmation email. Please do not lose this email or forget your password. Your password is irretreavable. |
Step 1 — Install the Bitwarden app
Go to bitwarden.com/download and install the app for whatever you use:
- Phone/tablet: iOS or Android
- Computer: Windows, Mac, or Linux
- Web browser: the Chrome / Firefox / Edge / Safari extension
You can install it on more than one device — your vault syncs to all of them.
Next, you need to log into your NEW SantoWarden vault account via the web. Check your email for the link to set up your vault password via the web. After you change your password (see figure below), you are now ready to log in.
Step 2—Point all of your apps to the new SantoWarden web vault (the important step)
Do this before you try to log in. By default the app connects to Bitwarden’s own servers, not to SantoWarden. You have to change that first, or login will fail.
Open the app. On the very first screen, before entering your email, look for the “Accessing” dropdown menu—usually near the bottom of the screen. Select “self-hosted” (see Figure 5). Next, you will be prompted to enter your SantoWarden vault’s URL. Every URL is unique because it uses the slug you selected at checkout. You will find your SantoWarden Vault’s URL in the confirmation email. It always starts with “https://” which denotes a secured connection. This protocol must always be included with your new vault URL (see figure 6).
Please remember that your email address and your SantoWarden vault URL are not the same thing.
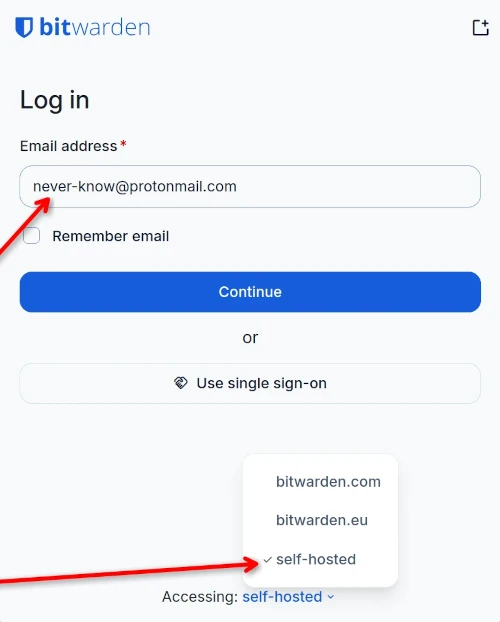
Figure 5
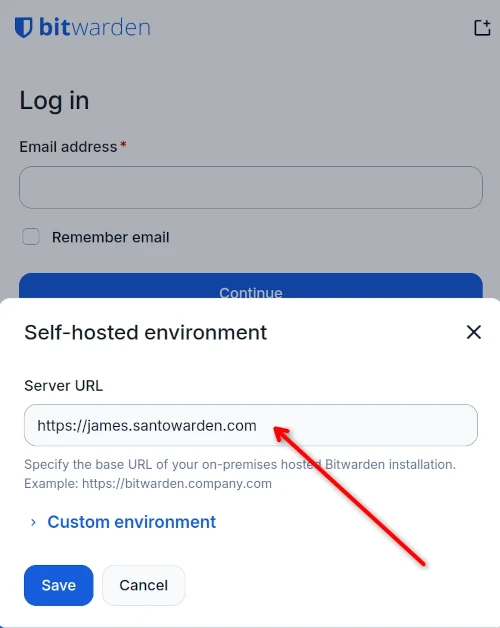
Figure 6
Log in to SantoVault using any Bitwarden client, or access your web vault with your unique SantWarden URL. See figures 7 and 8.
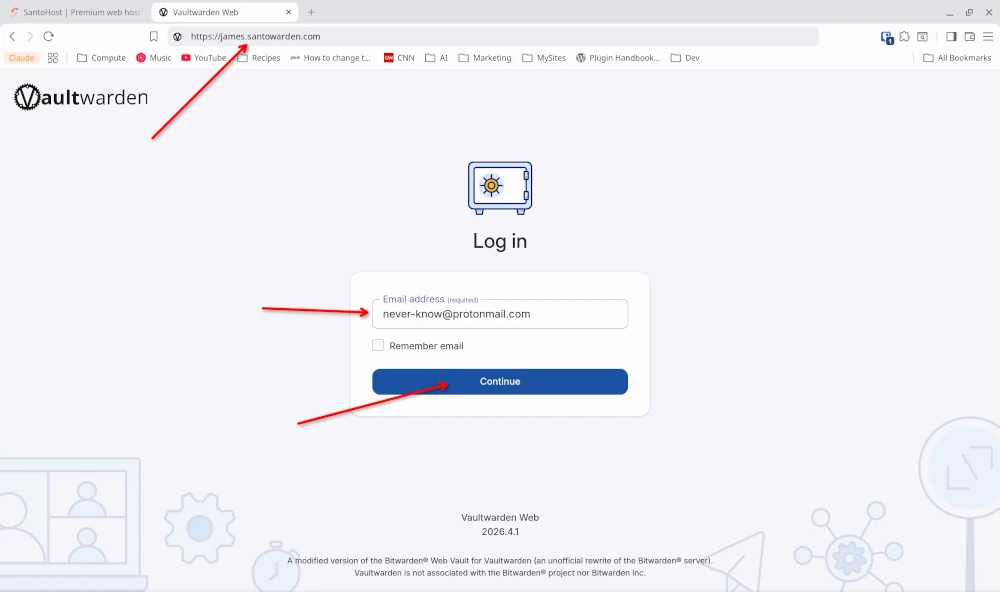
Figure 7
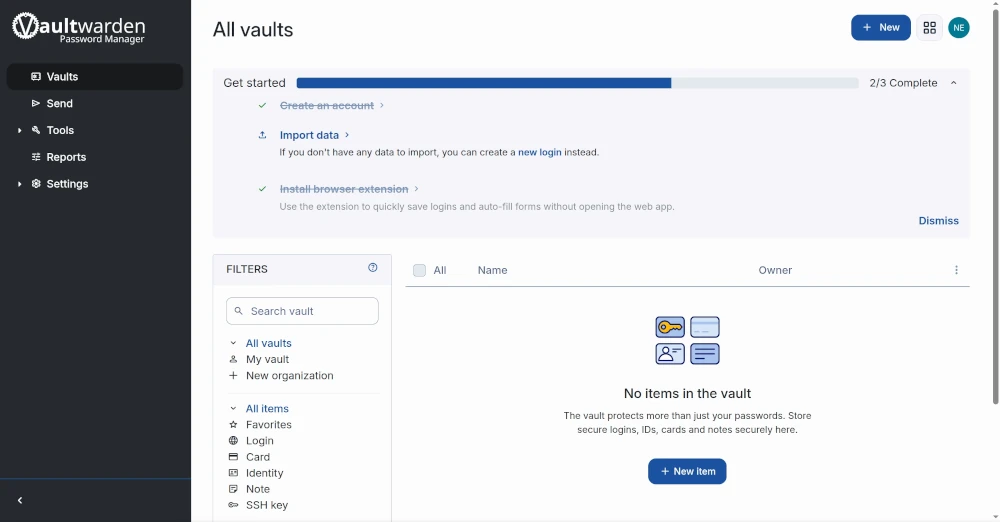
Figure 8
| Important! Remember this password you created because it can never be retrieved, and you will be locked out if you forget it. |
You’re done!
Your passwords now live in your SantoWarden vault and will sync to any device where you complete Steps 1–3. Install the app on your other devices whenever you like—just remember to set the server URL (Figure 5) on each one before logging in.
Congratulations! You are now logged in to your Bitwarden client with all of the pro features enabled.
Need a hand? Reply to your welcome email and we’ll help you through it.